
We love sharing DIY’s that are easy to recreate (with your bridesmaids & a few cocktails), fun and will add extra pretty to your next party. Remember this amaze DIY Bramble Workshop shared a while back for the gold sequin heart that was at Amanda’s wedding? Super gorge. We’ve got another one for you today. It has a few more steps than our usual tutorials, but as always feel free to customize colors, shapes, and add your own pizazz.
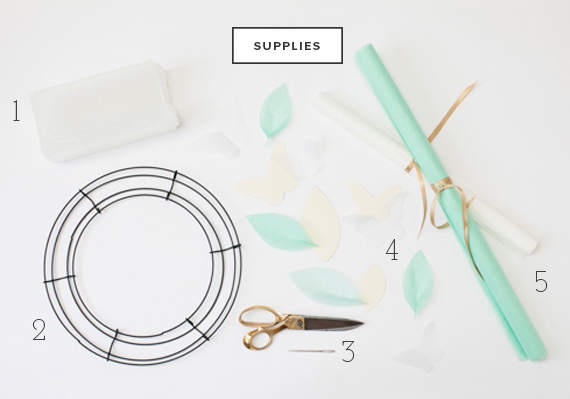
1. wax / 2. wreath form / 3. scissors + large threading needle / 4. leaf + butterfly paper tracing dies / 5. tissue paper

To make the waxed paper (shown above):
1. Melt a chunk of paraffin wax in a slow cooker.
2. Cover your work surface with a piece of non-corrugated cardboard or chipboard to protect the table from wax.
3. Lay down a piece of tissue paper and quickly brush wax across surface. Loose brush strokes are fine but make sure most of the tissue paper is covered. The wax will harden as you are working.
4. Place the second piece of tissue paper on top so the wax is sandwiched between the two layers.
5. Iron on top of the second piece of tissue paper. The hot iron will re-melt and spread the wax so that it saturates both pieces of tissue.
6. Quickly peel the paper off of the cardboard before the wax has completely hardened and allow to cool. The finished waxed paper should be stiff and translucent.

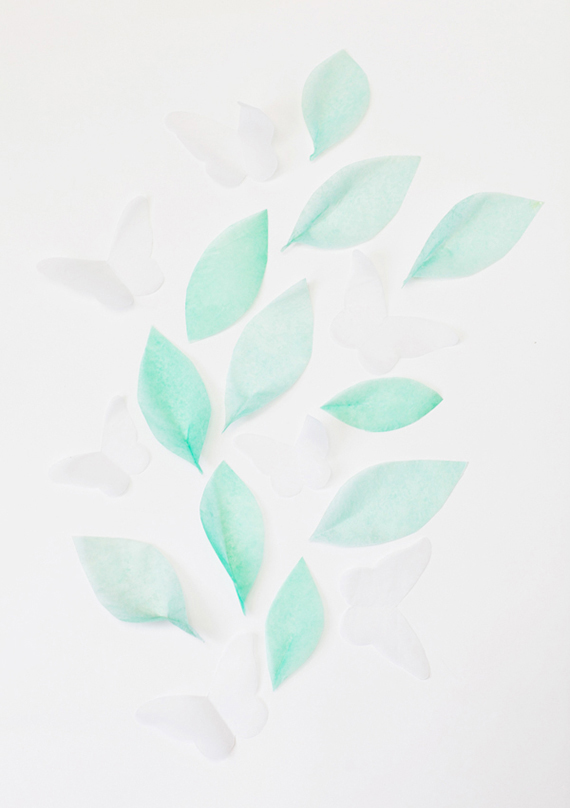
To make the leaves and butterflies:
1. Cut out leaves and butterflies to use as stencil.
2. Using a large dull needle (such as a tapestry needle) trace the shape onto the piece of waxed paper. Tracing with a needle instead of a pencil will give you a clean outline.
3. When the desired amount of leaves and butterflies have been traced, cut them out using a scissors.
4. Fold the butterflies and leaves in half to make them dimensional. Use a small drop of hot glue at one end of each leaf so that it holds its shape.
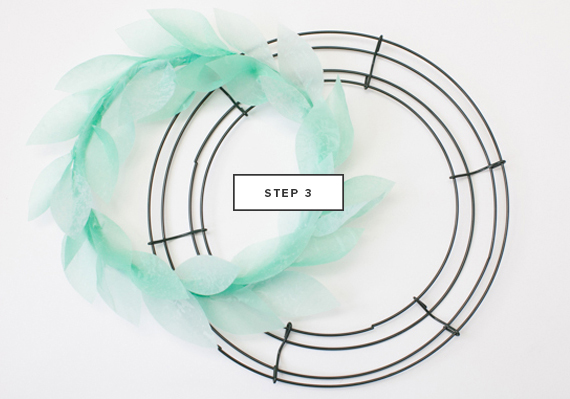
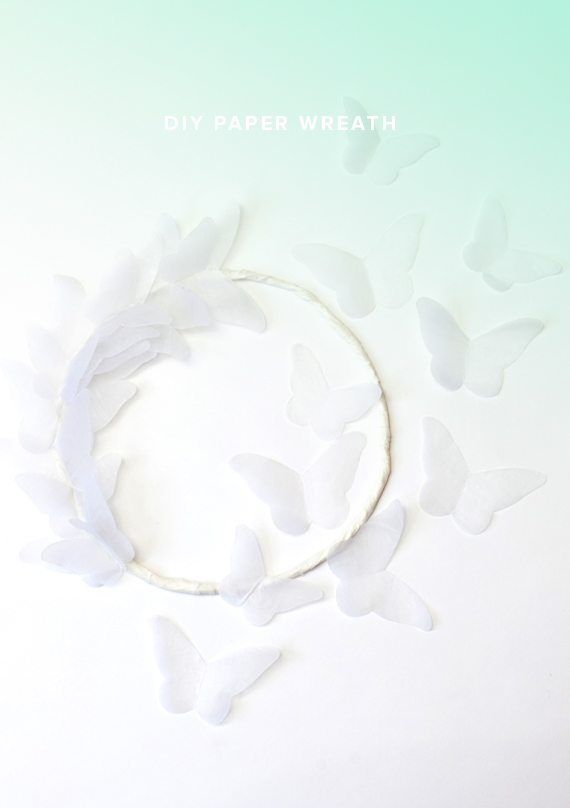
To make the wreaths:
1. If using a purchased wreath form, use a wire cutter to separate the two hoops (you’ll be able to make two wreaths from one wreath form).
2. Cut tissue paper into strips and wrap around the wreath gluing with a hot glue gun as you go. Cover the wreath with at least two layers of tissue paper strips.
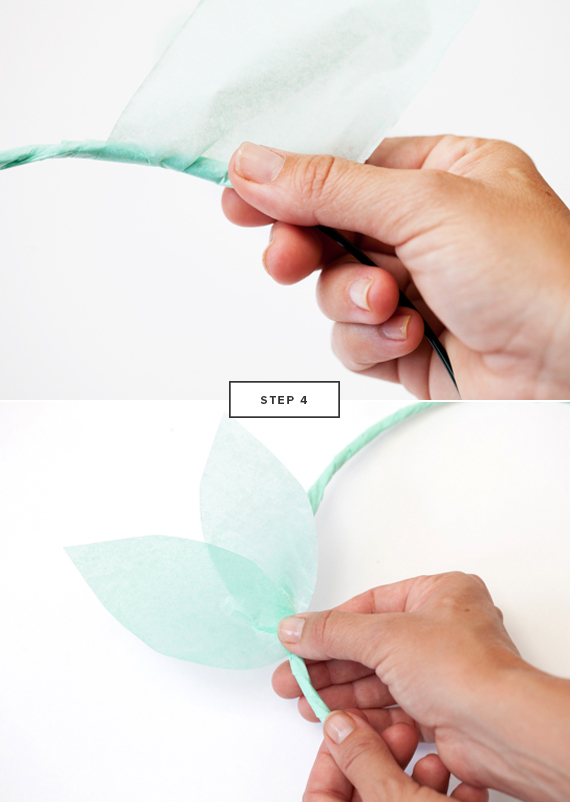

3. Glue overlapping butterflies or leaves around the wreath.
4. Hang using a ribbon or thread.
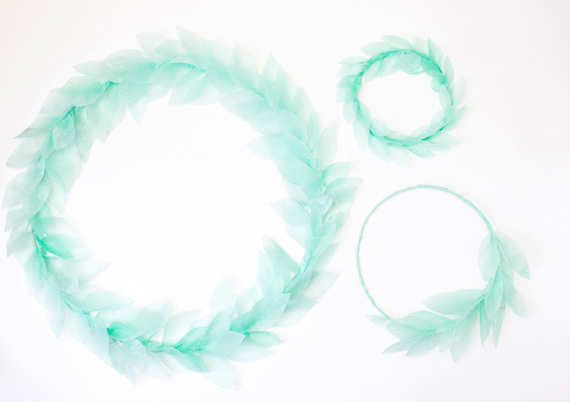

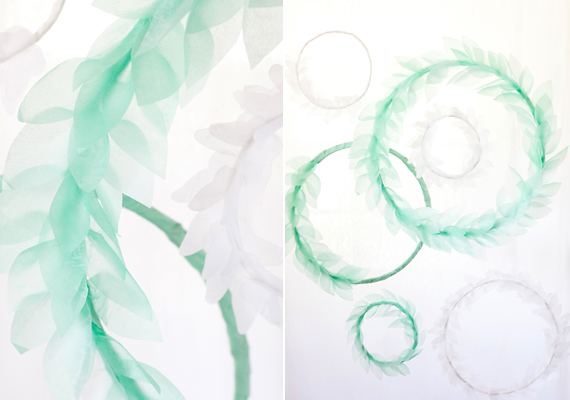
Cute, right? Don’t just make one of these. A cluster of wreaths in varying sizes and colors can be hung together to create a lovely backdrop.
Photos by Scott Clark Photo


