To finish off our short turkey day week, we have a simple but extremely handy tutorial from Brittni. As Brittni says, letterpress is so beautiful and so many people want it for their wedding invites, but it’s expensive. She’s come up with a cute way to incorporate the look of letterpress into a sweet little invite booklet. We’re going to let Brittni do the talking since she’s the expert on this project.
“You won’t need many materials to complete this project- just a needle and thread (or embroidery floss), blank letterpress cards, and a bookbinding awl is optional. You’ll also need access to a printer, and I would recommend using cardstock or a nice textured paper as well. The most important materials though are the letterpress cards that you choose. I chose a blind embossed eyelet lace set from Pistachio Press. Look for letterpress sets with multiple cards to save even more money, and use an A2 size card (4.25 x 5.5 inches).
“To begin this project, use your computer to create two documents. These documents will create the inside of your booklet and should contain the text for your invites. Use the guide below for formatting your text, as you will be printing two documents on one page (front and back). All text should be on the right hand side. Document 1 will have the text for pages one and two of your booklet, and document 2 will have the text for page four and three. Print document one and then feed that same printed document back into the printer and print document two on the back of that page.
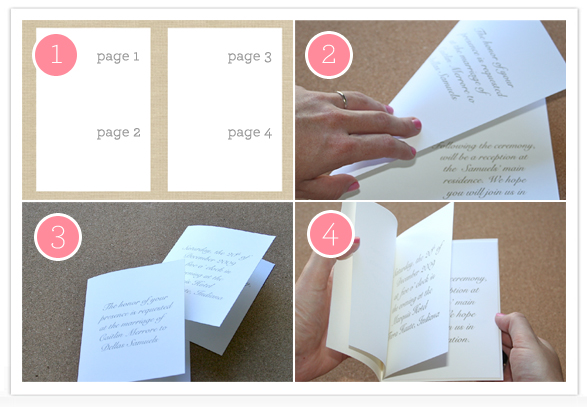
“Once you have finished printed, turn the paper to the side that has page one and two’s text on it. Fold the paper long ways, like a hot dog. Then, using a paper cutter, cut the sheet in half horizontally, separating page one’s text from page two. Now you have two folded pieces of paper.
“Fit one inside the other, so that your text reads correctly and in order (this is why you used the strange format for the text at the beginning). Then, trim excess so that it fits neatly into your letterpress card.
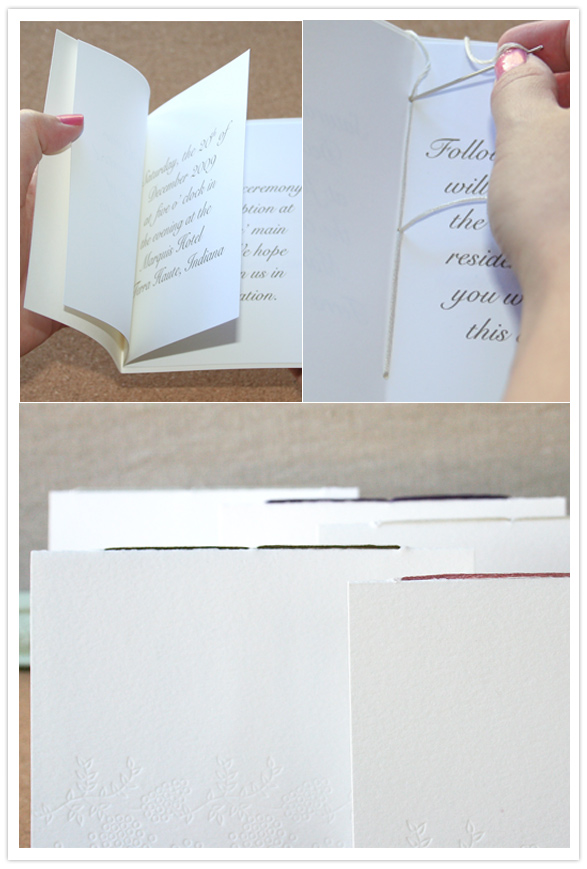
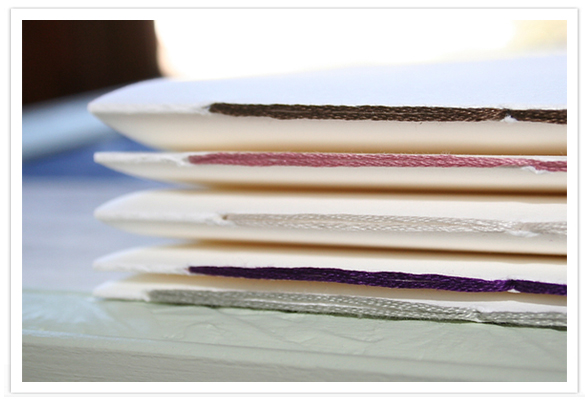
“Next, turn to the middle section of your newly formed booklet (page three). Using a stab or bookbinding awl, create three evenly spaced holes down the spine of your booklet. Next, use your needle and thread or embroidery floss to go through the three holes as if you are binding a book. Then tie the thread or embroidery floss off and cut off any excess. All done! Now your invites are ready to be placed in an envelope and mailed off.
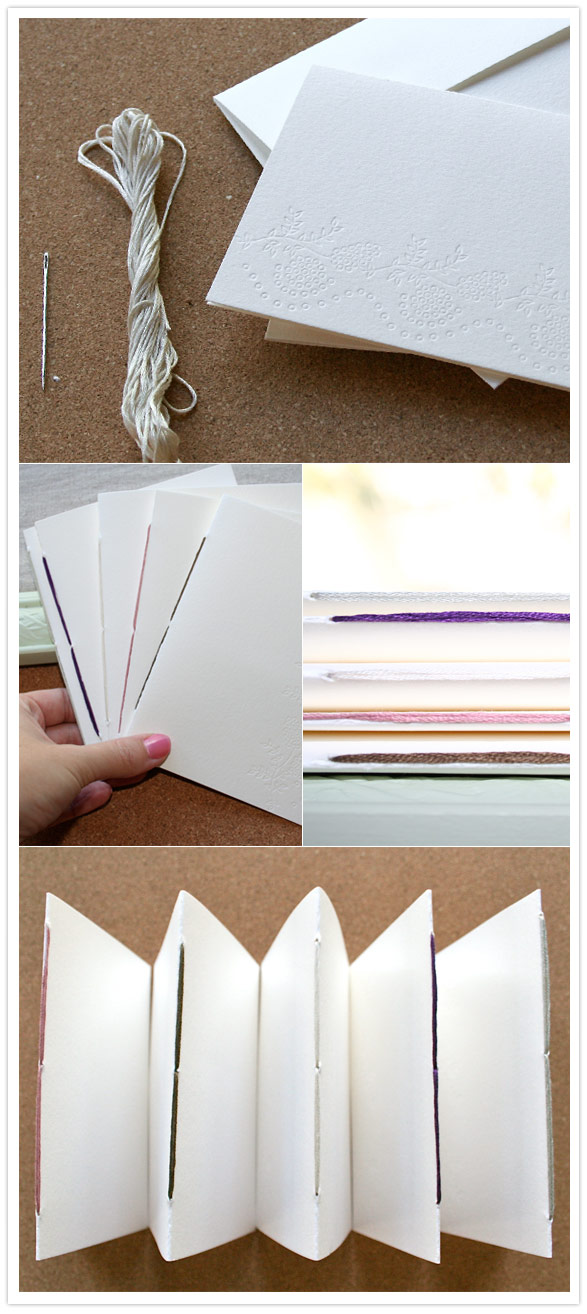
“These would also be great notebook wedding favors for guests if you used lined or blank paper instead of creating an invite!”
See, pretty simple right? We love the idea of turning this project into cute little favors too.
Thanks so much Brittni!


