


Happy December, Cakies! ‘Tis officially the season of DIY (you saw these paper flowers, yes?), and we’re excited about today’s tutorial, because guess who’s behind it? One of our past brides, Sam of Samantha Meyer Studio! You might recall this lovely silk ribbon in her bouquets (and a slew of other impressive DIYs) from her farm wedding. Besides being a talented calligrapher, Sam’s super crafty, and we’ve got her DIY dyed silk ribbon tutorial + wedding ideas as captured by Tiffaney Childs.
Take it away, Sam…

For my wedding, I used artificial dyes to get the color I was after, but I’ve since learned about plant-based dyes as a more eco-friendly option. I teamed up with sustainable textile designer Erica Lubetsky to teach me about natural dyes and demonstrate how to prep ribbons using a plant-based dye. Erica told me that the textile industry is one of the most wasteful industries, using an excessive amount of water, toxic chemicals, energy, and labor. One way to help with this is to use natural dyes, which can be collected from nature or purchased! Plus, I think natural materials give the silk a more organic, imperfect look.

Supplies
• Silk fabric in the length you’d like your ribbons. I usually buy three yards of fabric to get ribbon pieces that are each three yards long.
• Dyestuff. We used logwood dye extract, available here.
• Sharp scissors
• Metal pot, teaspoon, and tongs (that you won’t use for food after dyeing!)
• Stove/burner

We used logwood, which is found in the heart of a logwood tree. You can collect many types of flowers, plants, and vegetables to make your own dye as well. Even avocado pits and peels and onion skins can produce a range of colors, taking waste right from your own kitchen. To make a pale lavender-grey shade, we used only 2 teaspoons of logwood and left the silk in the dye vat for a short amount of time. To achieve a darker, more saturated purple color, you can add up to another full tablespoon of logwood to the vat and can leave the silk in the vat for an additional hour.

DIY dyed silk ribbon
1. Prep the dye. Dissolve 2 teaspoons of logwood in boiling water, enough to have your ribbons fully submerged under the liquid. If you want a consistent color with less marks in the silk, you can strain the dye stuff out of the water before adding the silk. We left it in because we like the variation in color.
2. Create the ribbon. Measure the silk fabric to the desired width, and use sharp scissors to cut a 1-2 inch slit in the spot where you want to tear the ribbon. At the spot where you cut the silk, begin pulling the silk apart. The silk will naturally tear a straight edge along the grain of the fabric to make a long ribbon. Then pull off the loose strands that come detached while tearing.
3. Soak the ribbons in clean water until they are fully saturated. Once the logwood is dissolved, put the wet ribbons in the dye vat. Bring the temperature down to medium after they have briefly boiled. Leave ribbons in for 8-20 minutes, depending on your desired shade. Stir often enough to have the ribbons evenly distributed in the vat and submerged fully for even color.
4. Rinse. After dyeing, rinse ribbons in cold water, until water runs clear and all excess dye is gone from the silk.
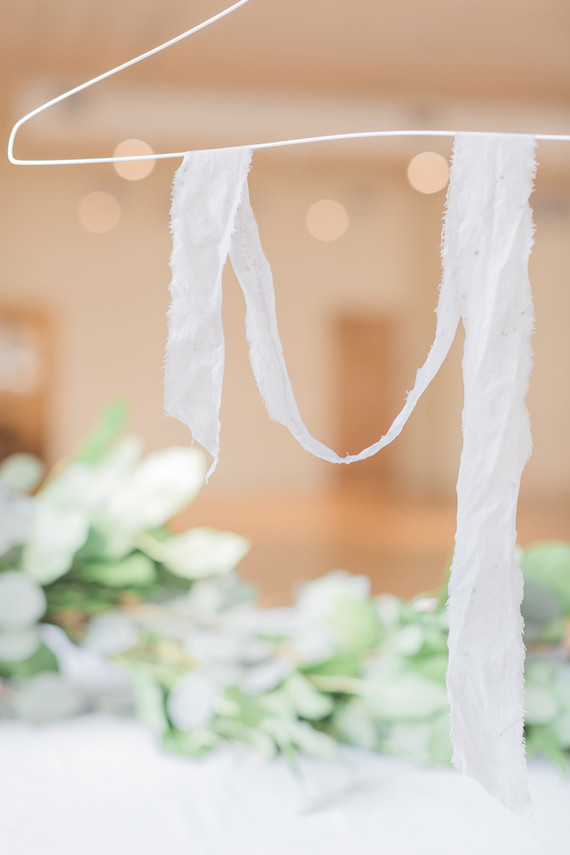
5. Hang to dry! The sun can fade some dye colors when drying, so we recommend drying out of the sun.

After your ribbons are fully dry, iron pieces for a finished look and lasting color. You can use a regular clothes iron, but I find it easier to use a hair-straightening iron.

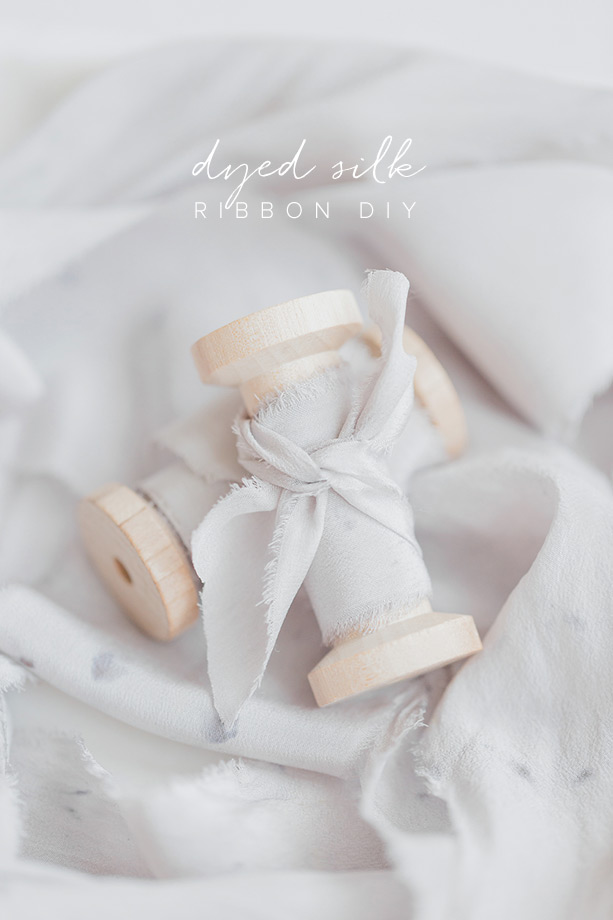
Wrap ribbon around a spool (or any cylindrical shape) so that it doesn’t get wrinkled.

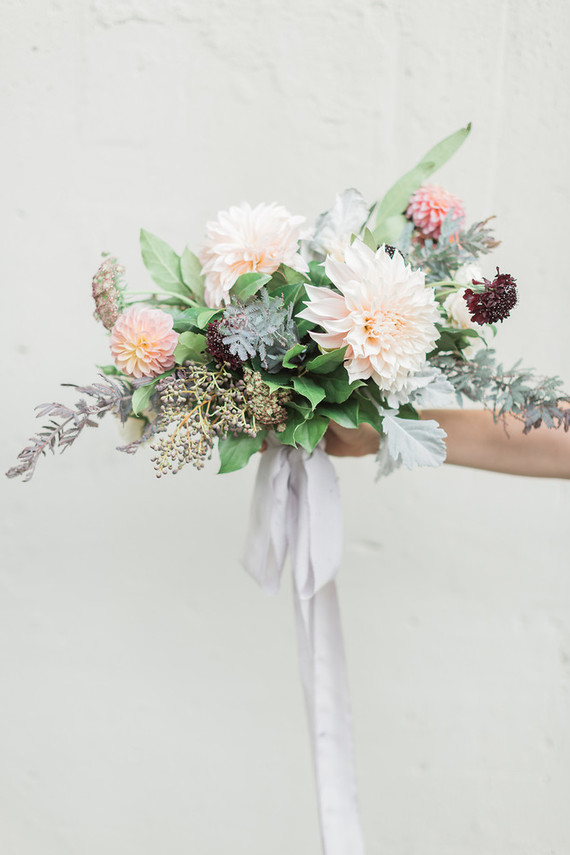
When you’re ready to tie the ribbon to your flowers, hold the bouquet near the center of the ribbon and wrap the ribbon around the base of the bouquet a few times to cover any floral wire or tape. Then tie the two ends together and trim if desired.


To provide even more inspiration, eco-conscious floral designer Lynn of Pollen Floral Design created a bouquet with local flowers for wrapping that pretty ribbon, and we shot this tutorial at Chicago’s most sustainable wedding venue, Greenhouse Loft.

Sam also created a collection of wedding stationery using 100% recycled cotton handmade paper.


If you’re making lots of ribbon for your wedding, get your bridesmaids together for a ribbon-making party and you’ll knock out all the tearing, dying, and ironing in a day!

Our brides are pretty creative, if you ask us! Let us know if you try this silk ribbon DIY.
Photography: Tiffaney Childs Photography / Venue: Greenhouse Loft in Chicago / Planning & Stationery: Sam Meyer of Samantha Meyer Studio / Florals: Lynn of Pollen Floral Design / Natural Dye Expert: Erica Lubetsky


