

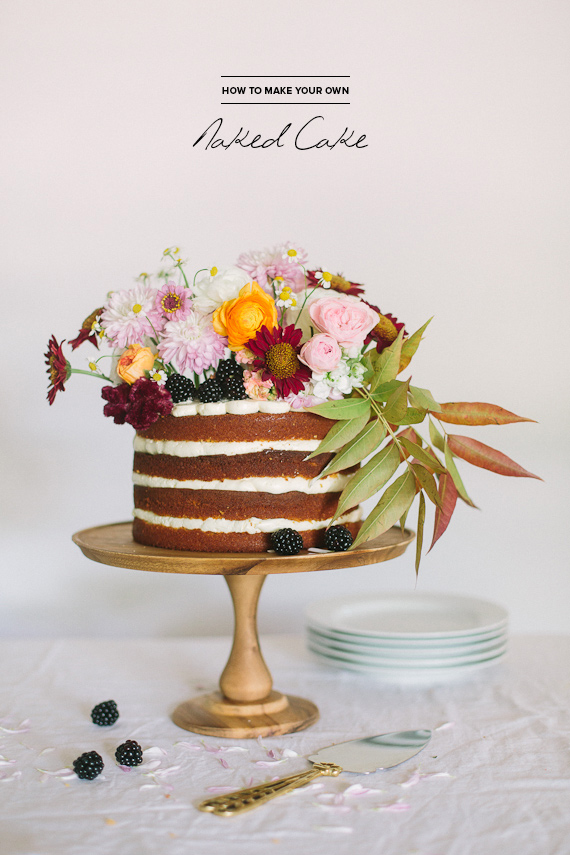
Go ahead and skim over the fact that it’s 9am and we’re already talking cakes thankyouverymuch. We’re just so excited to share that the gals at Cakewalk Bake Shop + Apryl Ann Photography have stopped by to offer a little baking how-to on our very favorite treats: the naked cake. Soo, if you weren’t yet convinced that we truly appreciate the beauty of a good unfrosted cake, the answer is a resounding Y-E-S.
Thanks to Emily of Cakewalk Bake Shop for showing us how it’s done!
Naked Cake
Supplies/Ingredients:
• two round evenly-sized cakes, we used 8″ x 2″ pans
• one round cake board (same size as your cake, ours is 8″)
• buttercream
• cake fillings (we used strawberry compote and fresh strawberries)
• piping bag
• round piping tip
• offset angled spatula
• revolving cake stand
• floral tape
• cake knife
• fresh flowers for decor
• flower sheers
• cake lifters
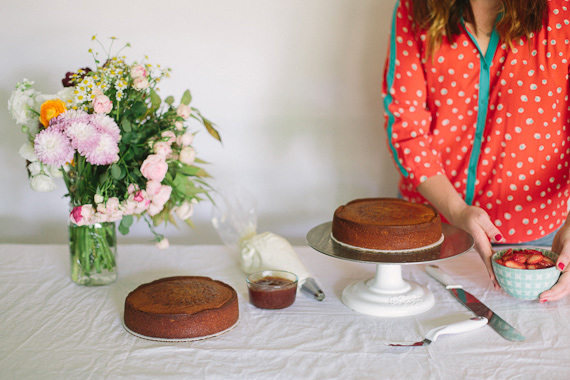
Step 1: Get ready. Fit piping bag with round tip and fill bag with buttercream. Secure cake board to the cake stand with tape. Place first cake onto cake board.
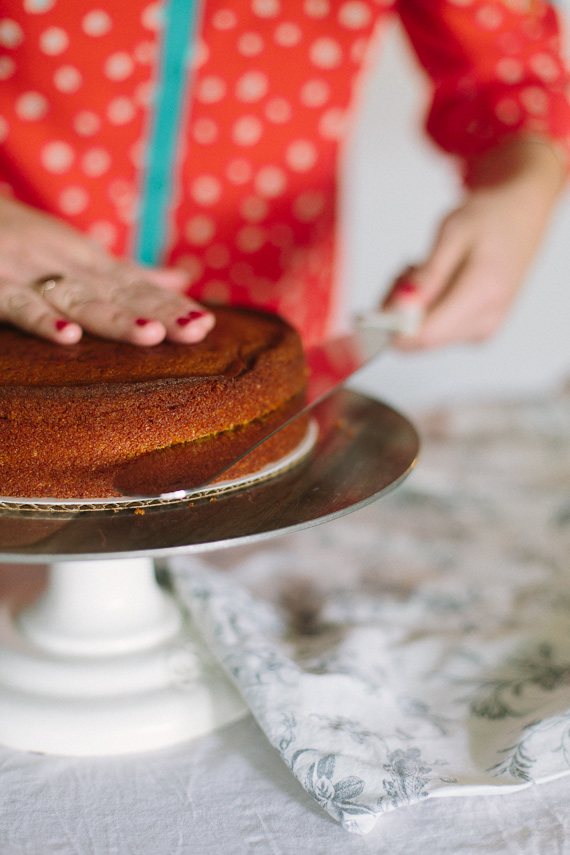
Step 2: Carefully and evenly cut the two cake rounds in half. Spinning the stand as you cut is helpful. Set aside cakes once they are cut.
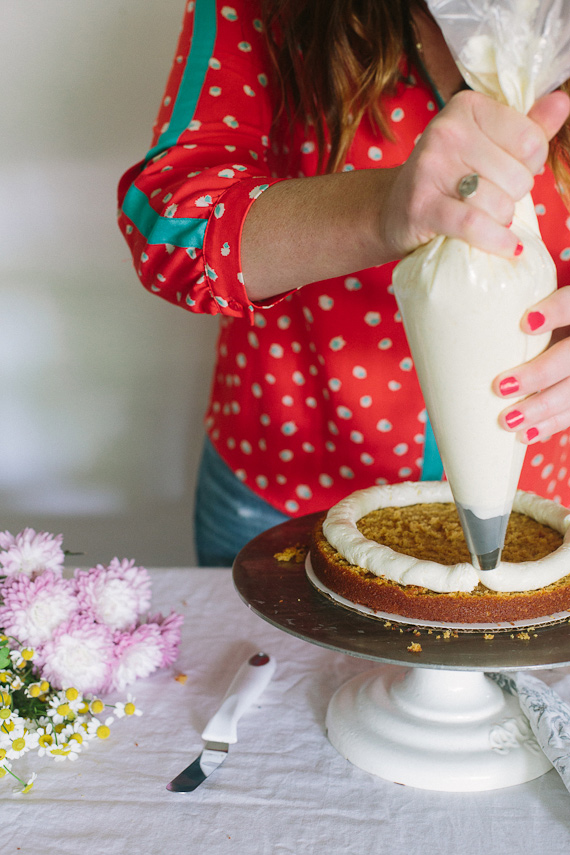
Step 3: Place one of the cake bases onto the cake round. Use the piping back to carefully pipe frosting flush with the edge of the cake. It’s like “outlining” in drawing – you make an outline of a circle that you will then fill.

Step 4: Use your offset spatula to even out the filling so that the next layer of cake will sit evenly on top.

Step 5: Gently lift up the next layer of cake and use your fingers to lightly jiggle the base to loosen any crumbs before placing on top of the piped buttercream layer. I call this finger dancing, because your fingers feel like they are dancing around under the cake layer. This will help keep your piped frosting looking clean and not covered with crumbs as you stack the layers of the cake.

Step 6: Repeat the process of piping a circle of buttercream onto the 2nd layer of cake. This keeps the outside looking consistent in size and also works as a barrier so that you can fill the inside with soft yummy things like: curd, compote, jam, ganache, etc. We filled ours with a strawberry compote rather than buttercream, evened it out, and then placed fresh strawberry slices on top.

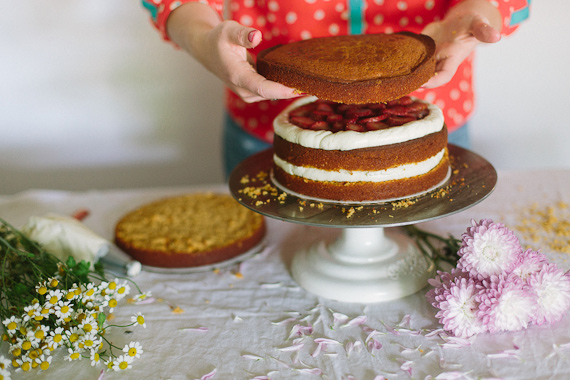
Step 7: Repeat the process of stacking your cake layer, then filling with buttercream, then stacking the final cake layer. I like to use the second cake base turned upside down as my top layer – this will give you a beautiful solid top.

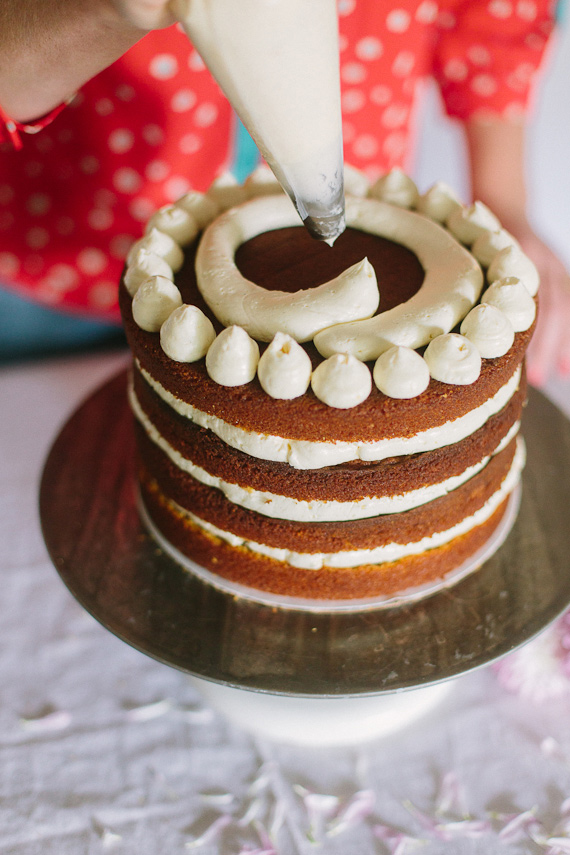
Step 8: If you’d like to frost the top layer, one way to do so is to pipe a circle of pearls to create a scalloped edge.
Step 9: Fill in the middle with buttercream.
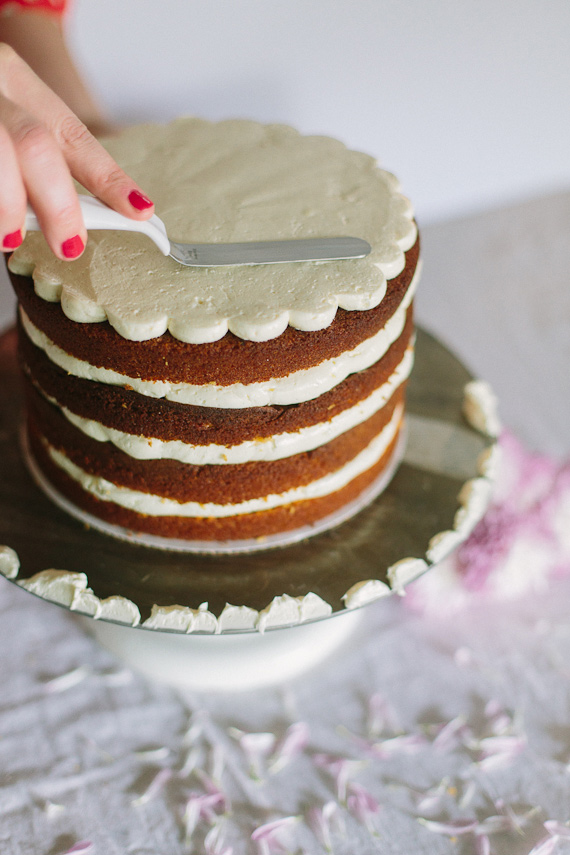
Step 10: Use your offset spatula to one by one pull the pearl tops into the middle of the cake.
Step 11: Gently smooth out the top of the cake using your offset spatula.

Step 12: Use cake lifters to gently transfer the cake to your cake stand of choice.

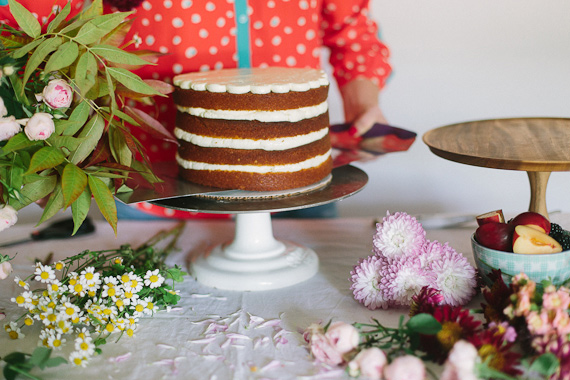


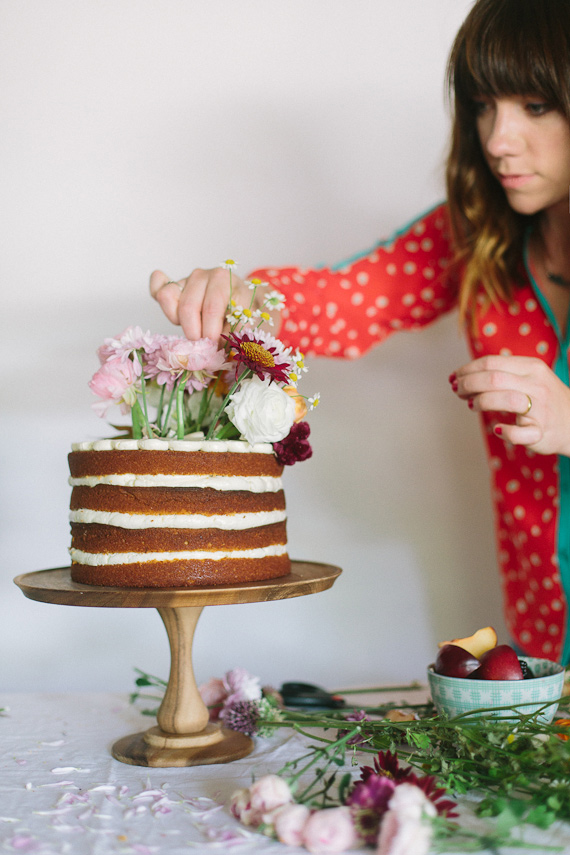
Step 13: Now for the fun part! Cut the stems of your flowers and place into the top of the cake however you’d like to create a beautiful, whimsical floral topper! Be sure to wrap the cut ends of the flowers in floral tape before inserting into the cake to protect the cake from any floral byproduct. I like to incorporate berries and fruit as well. And flamingos, of course!


Srsly gorgeous! Doing this ASAP.
*Note: It is very important to always wrap the floral stems in floral tape before inserting into the cake to prevent any pesticides from entering. You can also purchase stem holders from your bakery supply or crafting store. Using organic flowers that have not been treated by pesticides is also advisable, but please always take caution to protect the stems from leaking into the cake.
For another amaze treat by Cakewalk Bake Shop, try this apple cider donut recipe from last fall!
Photographer: Apryl Ann Photography / Naked Cake + How-to: Emily of Cakewalk Bake Shop /Flamingo cake topper: BHLDN


